Most sellers who contact us ask the same thing: "What do I need to do before you arrive?" After 8 years and 500+ staged properties across Toronto and the GTA, we have a very specific answer. What you do in the two to three weeks before staging determines how effectively the stager can work — and how well the finished result photographs. This checklist covers everything, in the order you should do it.
In This Guide
What do sellers need to do before staging?
Direct Answer
Before a stager arrives, sellers need to complete four things: declutter every room to remove personal items, excess furniture, and anything that crowds the space; deep clean beyond a regular tidy (walls, grout, windows, appliances); complete minor repairs (fill holes, paint touch-ups, fix drips, replace bulbs); and sort out logistics (parking access, keys, pets off-site). The stager handles everything from there. As of May 2026.
There is a straightforward way to think about this. Your job is to hand the stager a blank canvas. Their job is to paint the picture. If the canvas has clutter on it, personal memorabilia on every wall, worn grout in the bathrooms, and a dripping kitchen tap, the stager is starting from a disadvantage. The result will still be better than no staging at all — but it will not be what it could be with a clean, repaired, properly prepared home underneath it.
Start the preparation process three to four weeks before your target staging date. Decluttering almost always takes longer than sellers expect. Give it the time it deserves.
Phase 1: Declutter and edit
Key Principle
Buyers need to see the property, not your belongings. Clear all flat surfaces, thin closets to 50% capacity, and remove at least two to four pieces of furniture per room to create flow and make spaces feel larger. Box everything up and store it off-site.
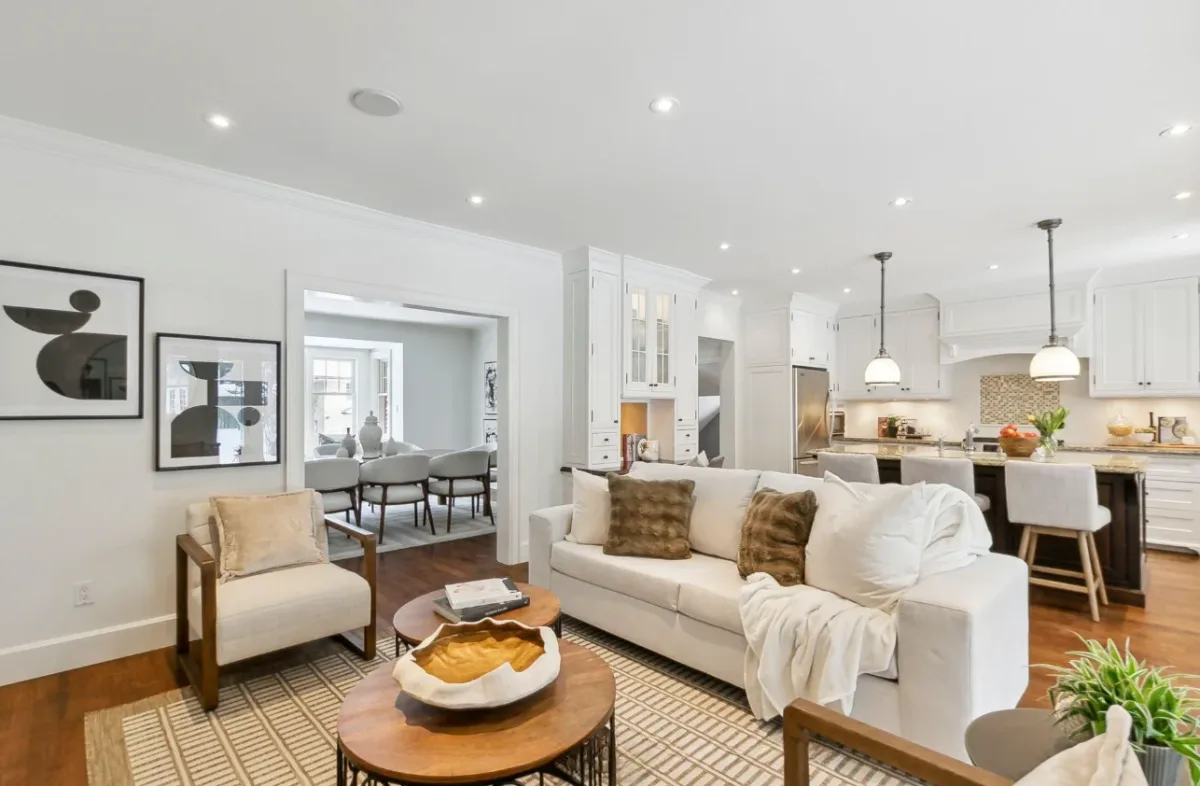
Living and dining areas
Living Room Checklist
- Remove all personal photographs and family memorabilia from shelves and walls
- Clear the coffee table entirely (stager will style it)
- Remove any armchairs, side tables, or floor lamps that crowd the room
- Take down bold artwork or gallery walls (leave walls bare for the stager)
- Remove area rugs if they are worn, dated, or strongly patterned
- Clear all shelving units to empty (stager will curate what goes back)
- Box up any children's toys, gaming equipment, or hobby items
Dining Room Checklist
- Remove all table coverings, placemats, and centrepieces (stager will set the table)
- Clear the buffet or sideboard completely
- Remove extra dining chairs if the set has more than six for a standard room
- Box up bar carts, wine racks, or anything that makes the room feel like storage
Kitchen
Kitchen Checklist
- Clear all countertops completely (stager will place two to three curated items only)
- Remove refrigerator magnets, notices, and children's artwork from the fridge
- Empty and clear the top of the refrigerator
- Remove dish racks, soap dispensers, and all items from around the sink
- Thin pantry shelves so they do not appear overstuffed
- Pack away any small appliances that will not be in use (toasters, blenders, coffee makers)
- Remove any items stored on top of cabinets
Bedrooms
Bedroom Checklist
- Remove all items from nightstands (stager will style them)
- Clear dressers and vanities completely
- Remove personal photographs from bedroom walls
- Take out any exercise equipment, clothing racks, or desk items that do not belong
- Clear closets to roughly 50% capacity so they appear spacious when opened
- Remove all items from under beds
- Put away or pack the existing bedding (stager will bring fresh linens)
Bathrooms
Bathroom Checklist
- Remove all personal grooming products, medications, and toiletries
- Clear the vanity counter entirely
- Remove any over-the-door organizers or suction-cup storage
- Take out all bath toys and children's items
- Remove worn or personal-coloured bath mats and towels (stager brings these)
- Clear under-sink storage to no more than half full
Where to put it all: a storage unit is the right answer for most sellers. Renting a small storage locker for the listing period typically costs $80 to $200 per month in Toronto. That is a sound investment when the alternative is staging a home that still reads as lived-in. Avoid filling the garage with boxes — the garage photographs too.
Phase 2: Deep clean
The Standard to Aim For
Staging-level clean is not a regular Saturday tidy. It means every surface, every corner, every fixture — walls washed, grout scrubbed, windows cleaned inside and out, appliances spotless inside and out, light fixtures wiped, baseboards done. If you can see grime anywhere, buyers can see it too.
Buyers notice things they would not notice in their own homes. A fingerprint on a cabinet front, a mildewy caulk line in the shower, an oven interior with baked-on residue — all of these register as signals of how the property has been maintained overall. Clean communicates care. And care is what buyers are paying for.
We recommend hiring a professional cleaning company for this step rather than doing it yourself. A thorough move-out-level clean by a professional service costs $300 to $600 for a typical Toronto home and takes a full day. It is one of the highest-return preparation investments you can make before staging.
Cleaning tasks that sellers most often miss
High-Miss Cleaning Checklist
- Walls and baseboards: wipe down every wall, particularly near light switches and door handles where marks accumulate
- Windows: inside and outside, plus window tracks and sills
- Light fixtures: remove and wash globe shades; wipe down flush-mount covers
- Oven interior: buyers open ovens; a dirty oven reads as a dirty home
- Refrigerator interior: sellers leaving the fridge need to clean it; sellers removing it need to clean the floor beneath
- Bathroom grout: scrub tile grout to remove discolouration; re-caulk if existing caulk is mouldy or cracked
- Inside cabinets and drawers: buyers open these; line with fresh shelf paper if surfaces are stained
- Carpets: professional cleaning or replacement if heavily worn or stained
- Garage floor: sweep and degrease any oil stains
- Furnace room and utility areas: organize and clean; buyers and inspectors look here
Phase 3: Minor repairs and touch-ups
What to Fix and What to Skip
Focus on visible, low-cost repairs: fill nail holes, touch up paint, replace burned-out bulbs, fix dripping taps, tighten loose hardware, and caulk where needed. Skip expensive renovations unless your realtor specifically advises them. A refreshed and repaired home almost always delivers better ROI than a renovated one when you are preparing to sell.
Repairs Checklist
- Fill nail holes and screw holes in walls with spackling compound; sand smooth and touch up with matching paint
- Paint touch-ups: scuffs, chips, and marks on walls, door frames, and trim; use the same finish as the existing paint (flat, eggshell, or satin)
- Replace all burned-out light bulbs with consistent daylight-temperature LEDs (2700K to 3000K) throughout the home
- Fix dripping taps in kitchens and bathrooms; a dripping tap is noticed by every buyer and every inspector
- Tighten loose cabinet handles and drawer pulls throughout the kitchen and bathrooms
- Re-caulk around the bathtub, shower surround, and kitchen sink if existing caulk is cracked, yellowed, or mouldy
- Repair or replace any broken switch plates or outlet covers
- Fix doors that do not close properly or hinges that squeak; buyers test every door
- Replace worn or missing weatherstripping on exterior doors
- Patch any visible water damage stains on ceilings or walls; have the source repaired before patching or buyers and inspectors will flag it
On renovations before listing: kitchen and bathroom renovations rarely return their full cost in a sale. A properly staged, clean, and well-priced home in original condition typically outperforms a partially renovated one where the seller has spent $30,000 on new counters but nothing else has changed. Talk to your realtor and stager before committing to anything beyond the list above.
Phase 4: Exterior and curb appeal
Staging starts at the street. Buyers form an impression of your property from the listing photographs before they book a showing. When they arrive in person, the exterior is the first thing they experience. A well-presented exterior creates momentum that carries into the interior showing. A neglected exterior creates doubt that staging inside has to overcome.
Exterior Checklist
- Mow and edge the lawn; trim back any overgrown hedges or shrubs
- Power wash the driveway, front walkway, and front porch or steps
- Clean the front door; paint it if the current colour is worn or dated
- Replace house numbers if they are corroded, missing, or hard to read
- Clean or replace the mailbox if it is visible from the street
- Remove any garden clutter: old pots, hoses left out, children's outdoor toys, garden tools
- Add a seasonal planting in a large pot by the front door if the season allows
- Clean windows from the outside at the same time as the interior
- Clear and organize the garage if it will appear in photography or showings
- Check the backyard or balcony: clean furniture, remove worn items, and ensure the space photographs well
The week of staging and staging day
Once decluttering, cleaning, and repairs are complete, the final week is about logistics. Getting these details right means the staging team can work efficiently from the moment they arrive.
The week before staging
Pre-Staging Week Checklist
- Confirm access with Kelly Allan Design: lockbox code, key location, or someone to let us in
- Ensure parking is available in front of the property for the staging truck (typically a large cube van or flatbed)
- Notify neighbours if the truck will block the street temporarily
- Book professional photography for immediately after staging is complete (same day or next morning)
- Confirm pets will be off-site for the full staging day
- Do a final walk through every room to catch any remaining items the stager should not have to work around
Staging day
Staging Day Checklist
- Be out of the property for the full day; plan to return after the team has finished and called
- Pets must be off-site; the team will be moving large furniture through all areas of the home
- Leave the climate at a comfortable level (not too hot or cold)
- Leave all lights on and blinds or curtains open so the team can assess lighting throughout
- Do not return mid-installation; let the team work without interruption
Installation for a typical GTA home takes four to eight hours for a full vacant stage. The team handles all furniture placement, art hanging, bedding, and accessory styling. When they are done, the property is photo-ready.
Schedule the photographer to arrive immediately after staging is confirmed complete. The biggest mistake sellers make at this stage is delaying photography by one or two days. The staging looks its best on day one. Book photography for the afternoon of staging day or early the following morning.
What not to do before staging
Eight years of seeing preparation mistakes play out means there is a clear list of things sellers do that make the stager's job harder, reduce the quality of the result, or cost money unnecessarily.
Do not buy furniture or accessories before the staging consultation
For vacant staging, Kelly Allan Design brings everything from our 10,000 sq ft Toronto warehouse. For occupied staging, the stager specifies what is needed after seeing the home. Buying furniture in advance means risking the wrong scale, wrong tone, or wrong style. The stager then has to work around it. Save the money.
Do not paint rooms a bold or very dark colour
Some sellers repaint rooms a dramatic shade in the weeks before listing, reasoning that it will stand out. Bold colours narrow buyer appeal and work against neutral staging furniture. If you are painting, choose a warm neutral. Your stager can advise on a specific colour that works with their inventory.
Do not leave the home in a half-packed state
A home that is partly cleared with boxes visible in corners, half-empty shelves, and furniture pushed to walls for packing does not stage well. Either the home is occupied and lived-in (which the stager can work with), or it is cleared and ready (which the stager prefers). The in-between state is the hardest to work with and often produces the weakest result.
Do not wait for the stager to tell you what to declutter
Some sellers want to wait until the stager arrives to decide what stays and what goes. This delays the process by days and uses staging time (which you are paying for) on decisions that are the seller's responsibility. Review this checklist, make those calls in advance, and hand the stager an empty canvas to work with.
Do not skip professional photography after staging
Phone photographs of a staged property are significantly weaker than professional real estate photography of the same property. The ROI on staging is substantially tied to how well the listing performs online, where buyers are making their shortlisting decisions. Professional photography typically costs $300 to $600 in Toronto. It is not optional if you want the staging to return its full value.
Frequently asked questions
Ready to get a fixed-price staging quote?
We respond within 1 business day. Same-week installation across Toronto and the GTA.
Get a Free Estimate